Create PDFs Using Notability

Written by Daniel Elliott
Updated at October 25th, 2024
Table of Contents
Create PDFs Using Notability
Product: iPads and Notability App
Audience: Teachers, EA/IA’s, Students
Overview
This walkthrough will show you how to use the Notability App and an iPad to create PDFs.
Tools/Equipment Needed
- CSD Managed iPad
Video Walkthrough
Find and Open the Notability App
Locate the Notability App
-
Tap on the Notability app
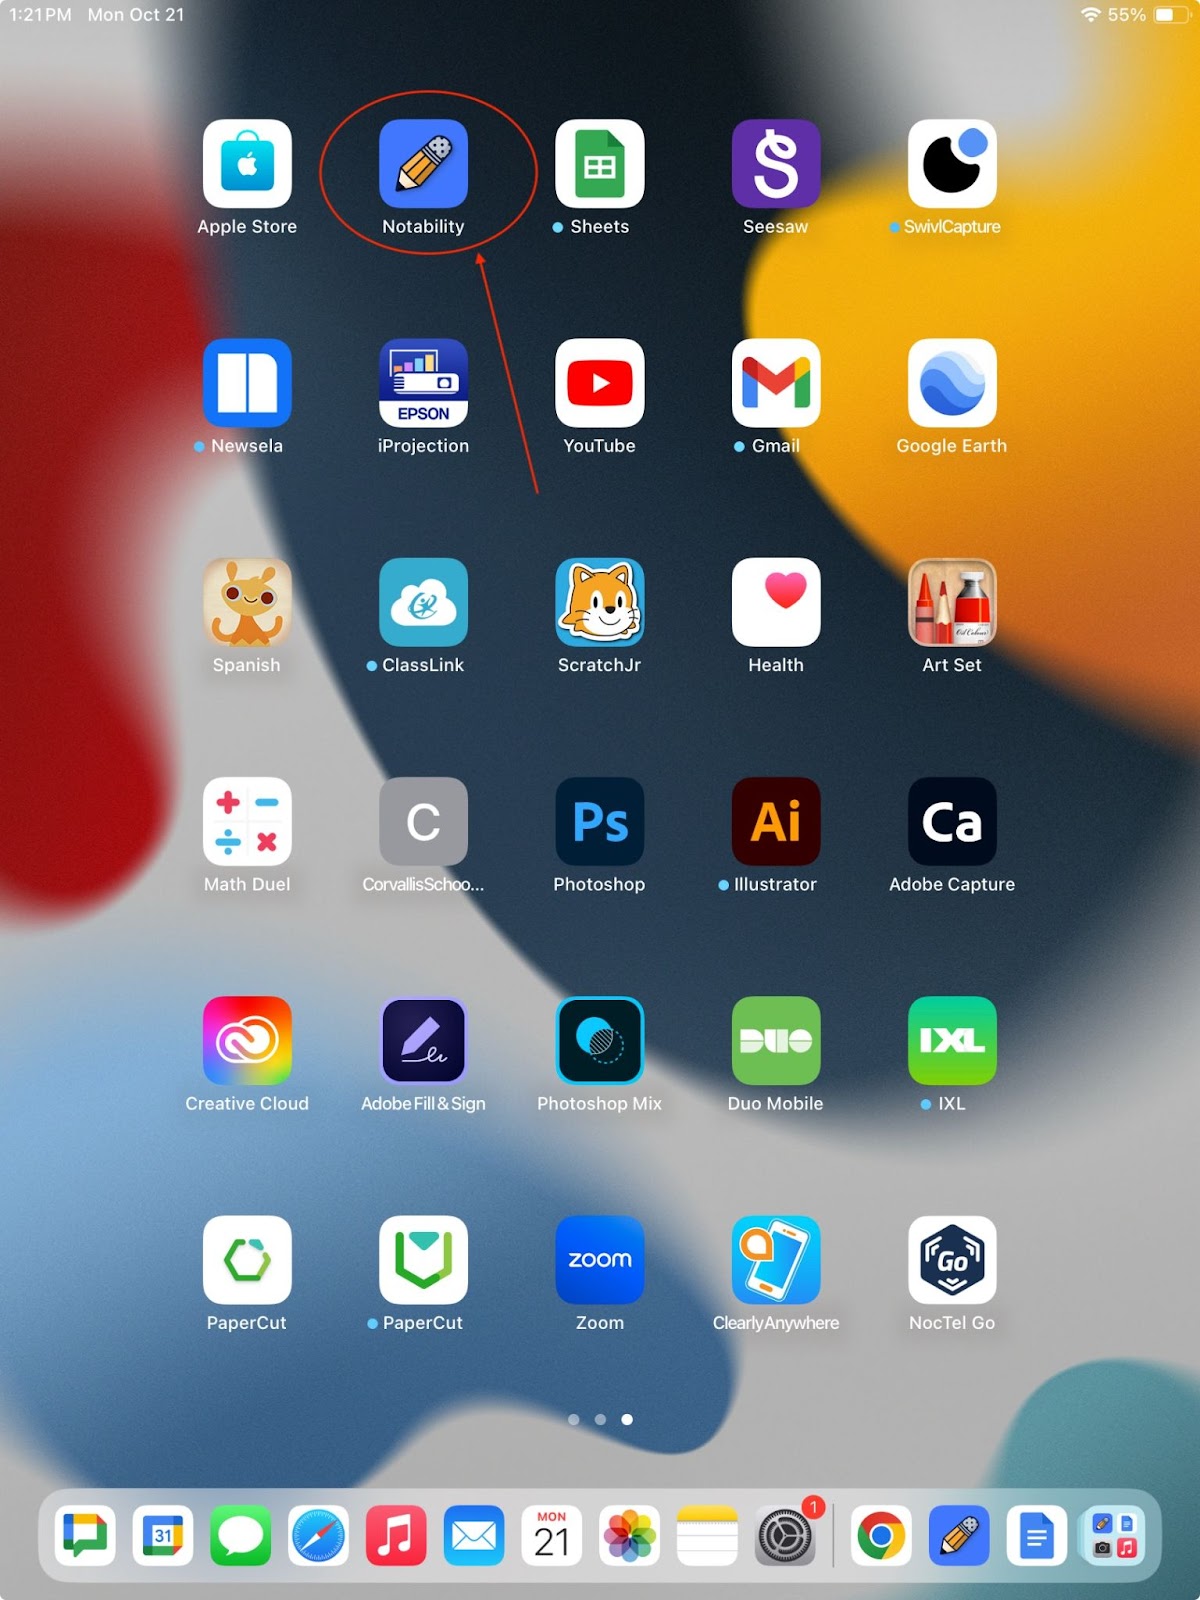
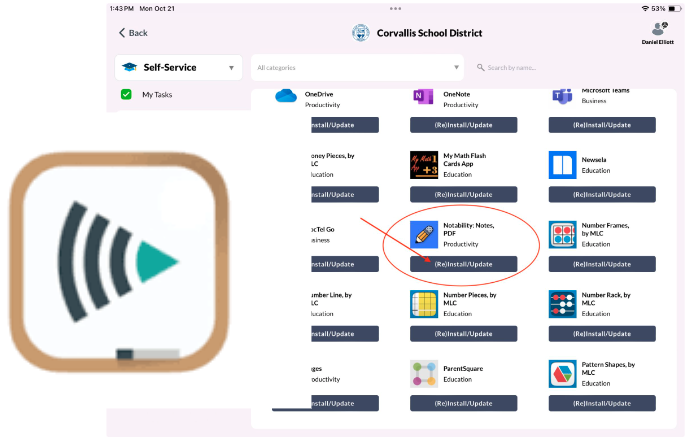
Can’t find it? Install it via the Manager App (Self Service)
-
Tap on the Manager App, find Notability, and Tap Install
- It may take a few minutes to complete the installation
Scan Documents with Notability
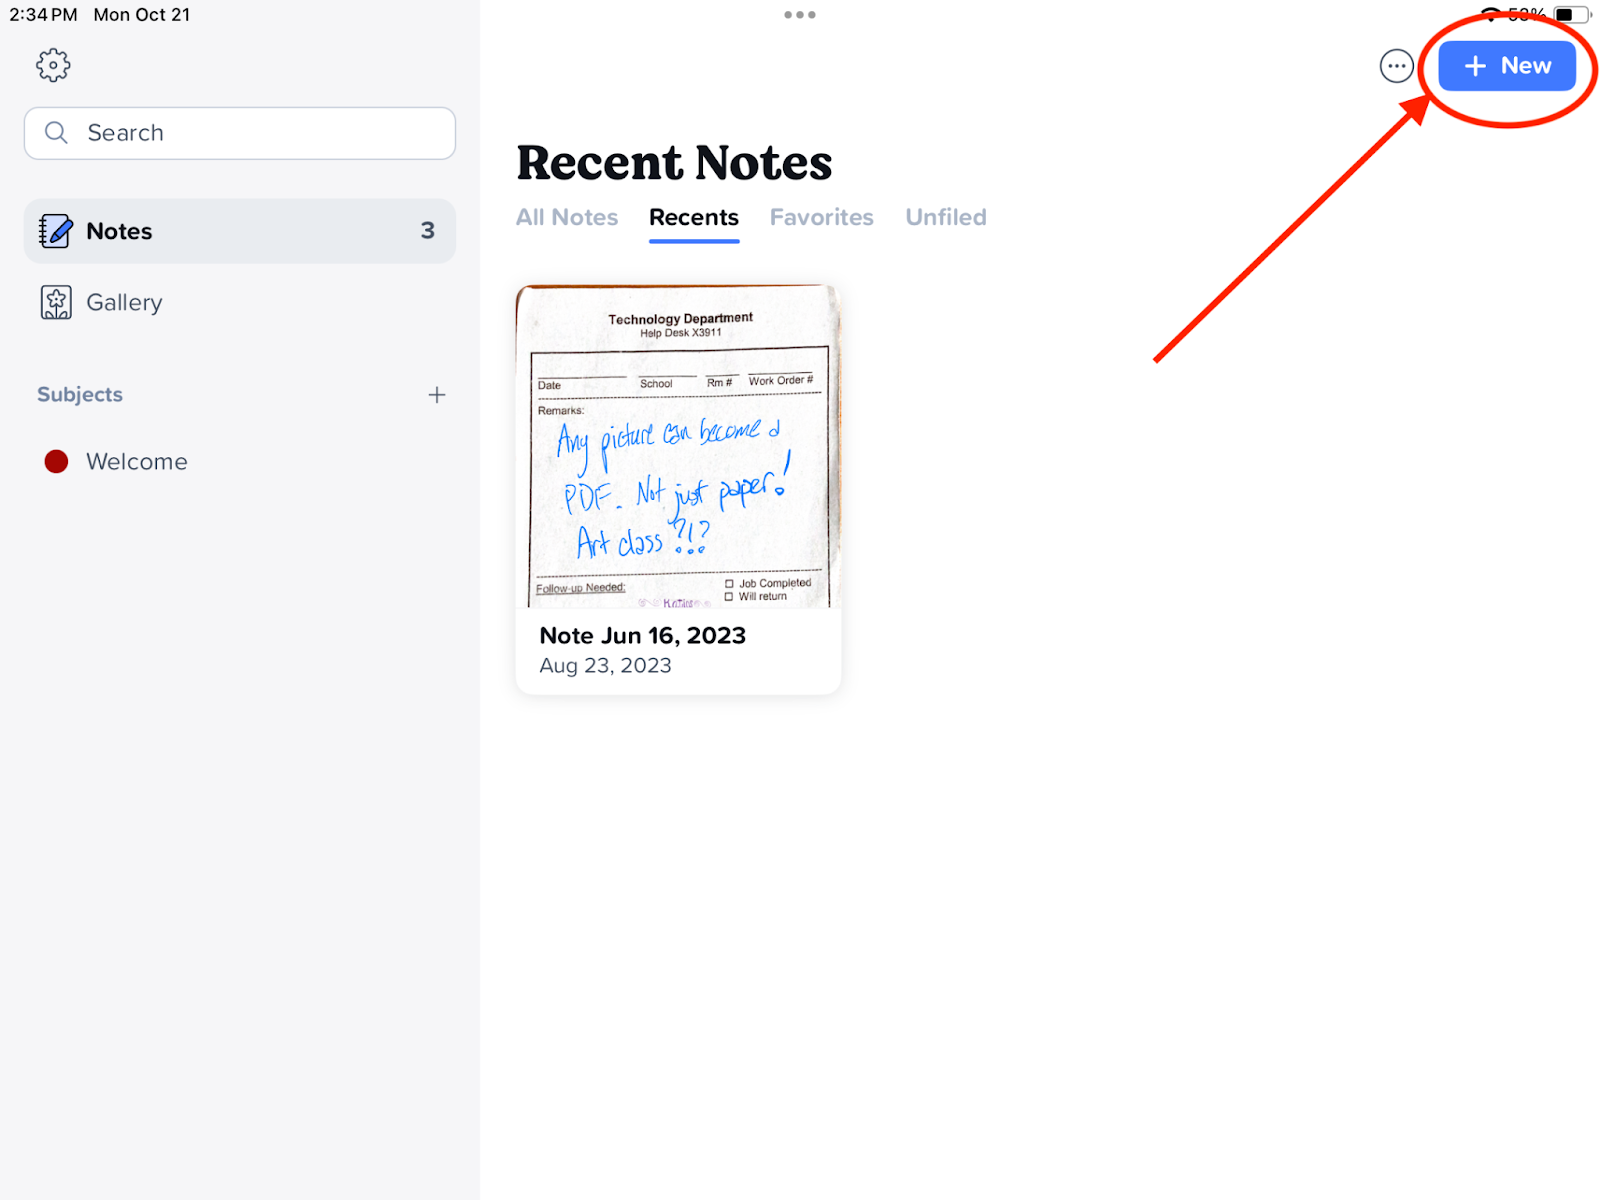
Create a new Note and Select Scan
-
First, start a new Note by “tapping” on the “+New” button.
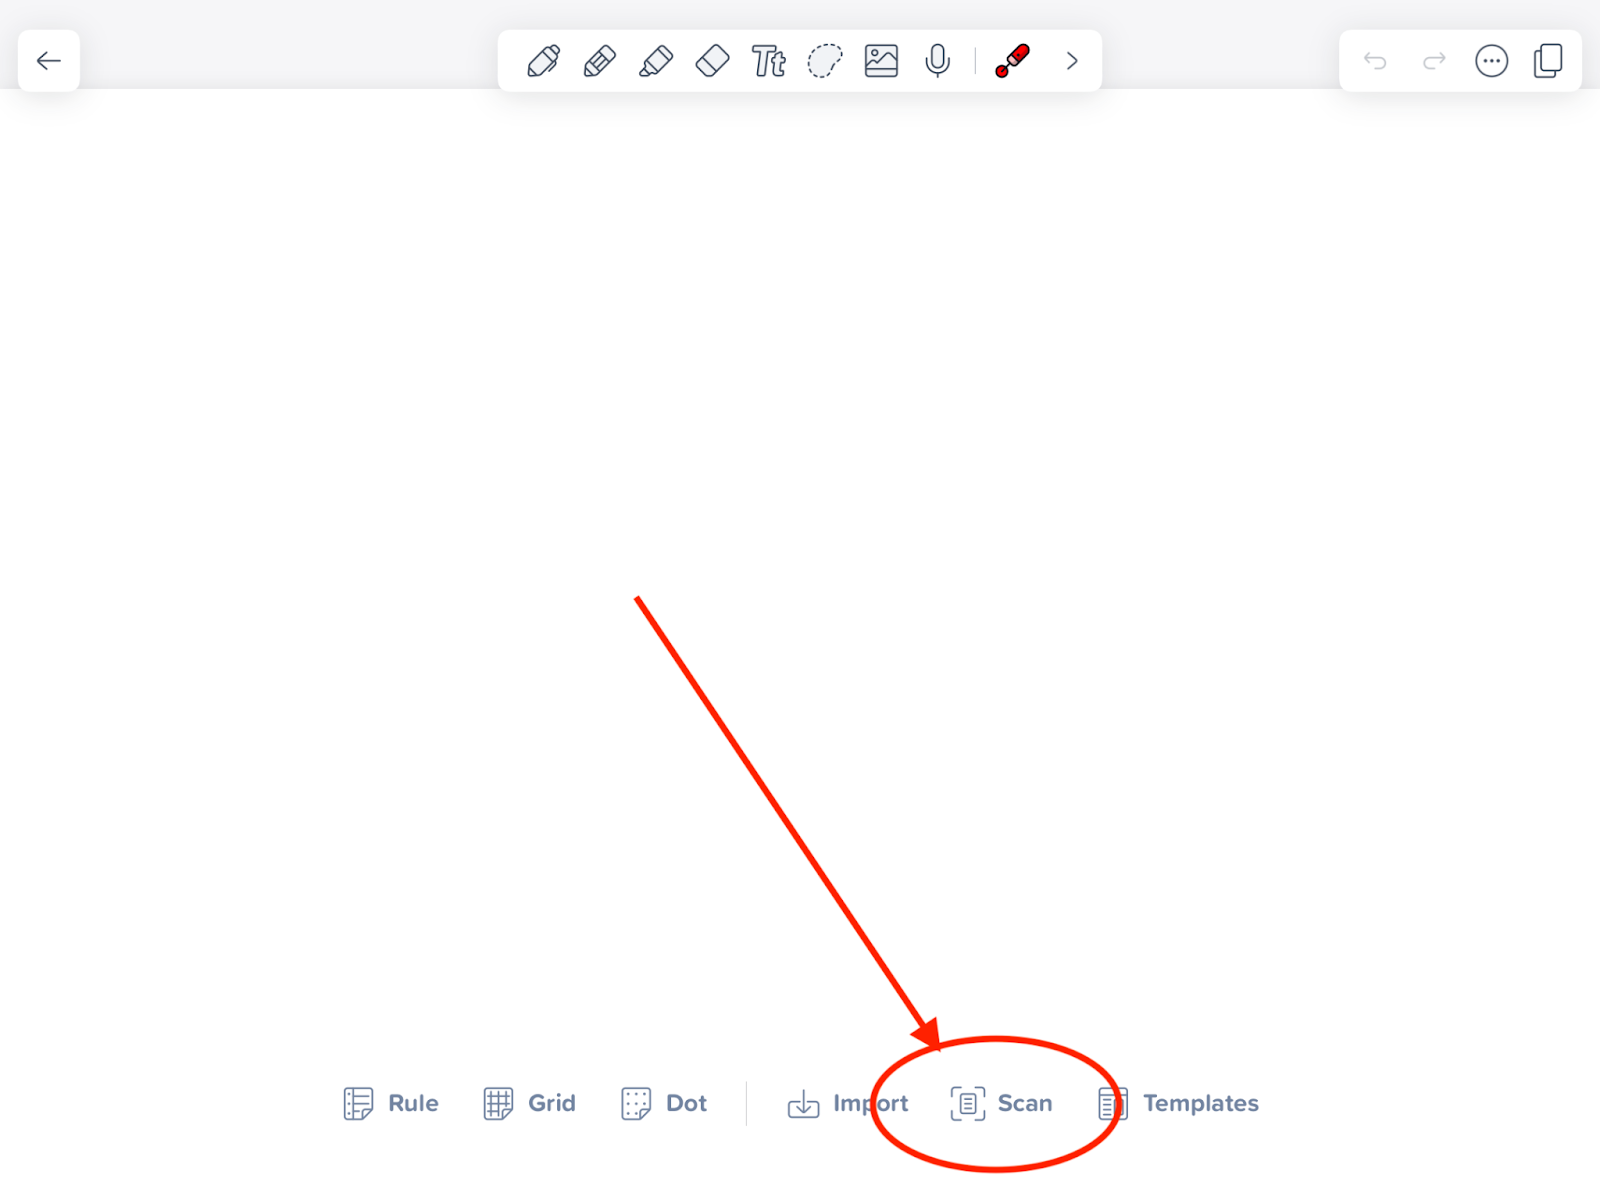
-
Next, tap on the “Scan” icon and if prompted, accept permissions to access the iPad’s Camera
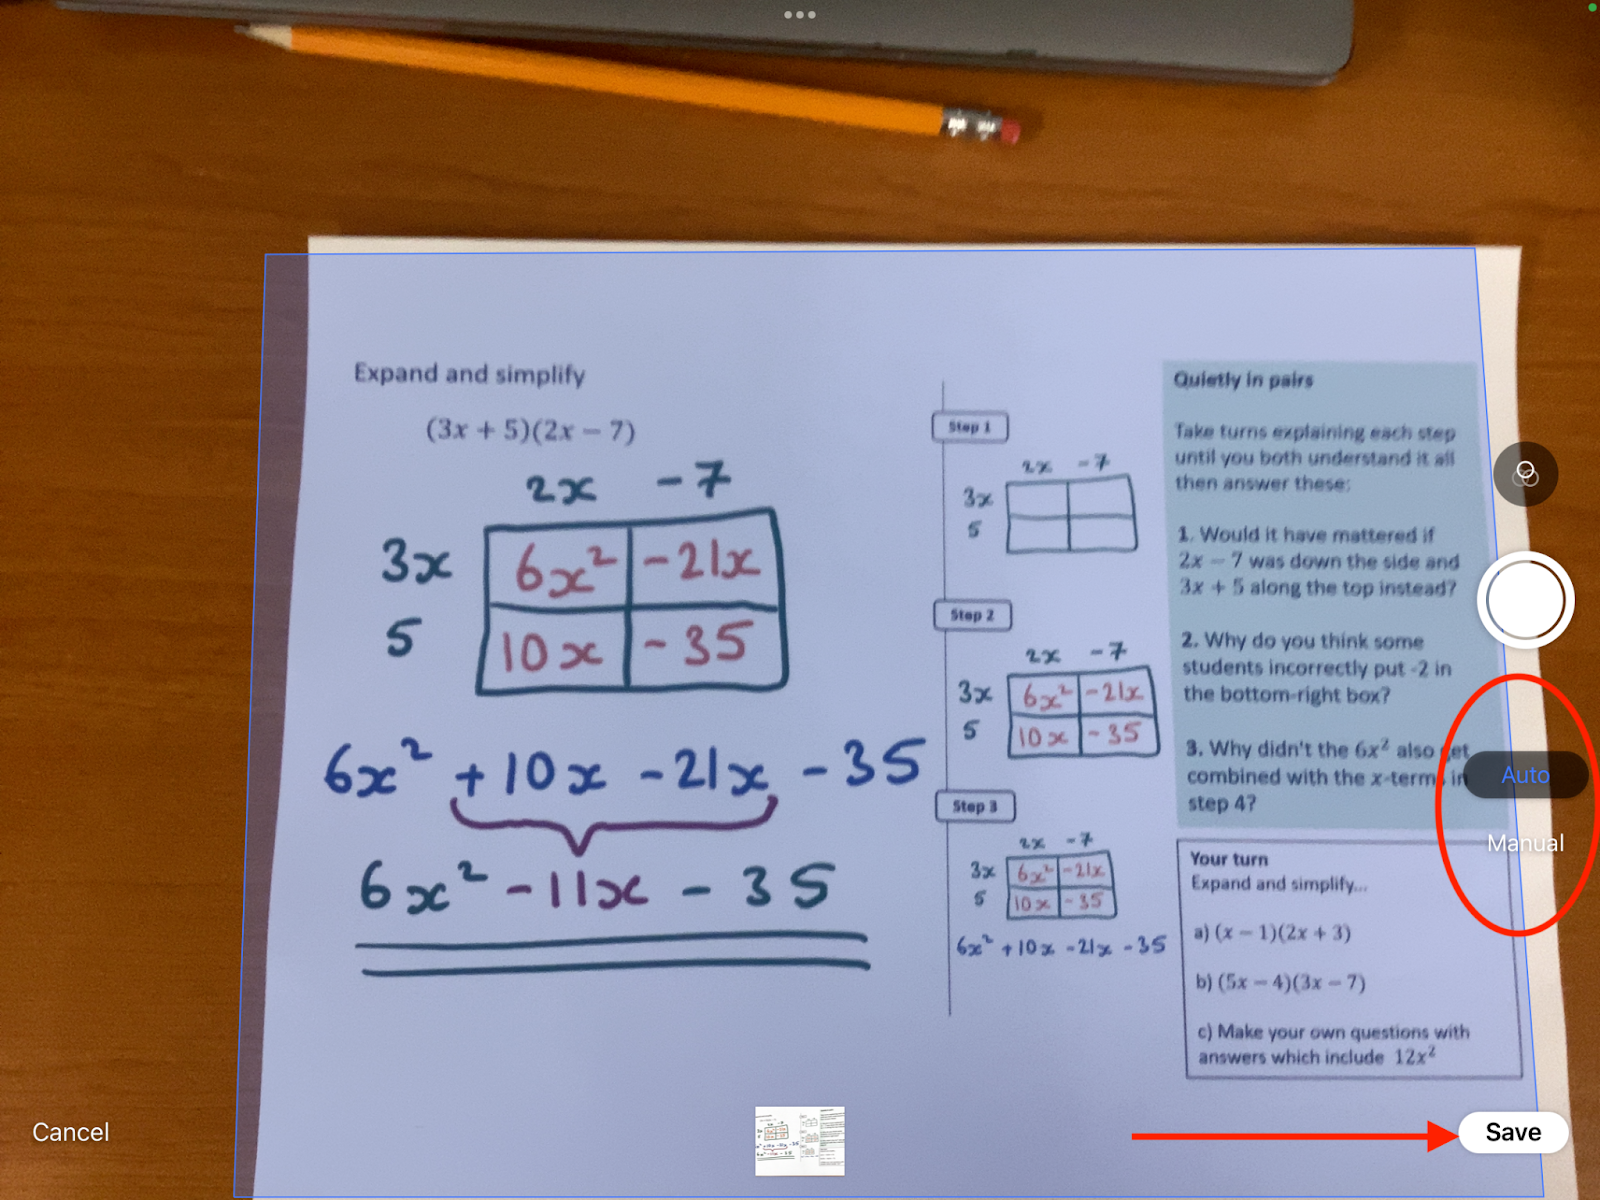
Scan Document(s)
-
By default, Notability Scanning will be set to “Auto”. It will auto-focus and take pictures when it detects objects like paper. If you want, you can switch to “Manual” to take the pictures yourself. Each picture taken will create a thumbnail at the bottom of the screen. You can retake and/or delete any images you don’t want. Once you’re done, tap “Save”.
-
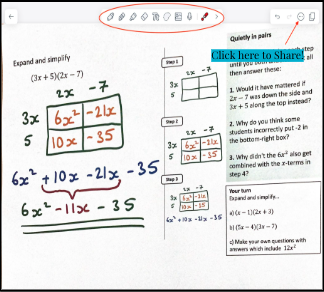
Next, tap “Insert as PDF” and now you have a PDF saved on your iPad. You can annotate that PDF if you’d like to make any adjustments or you can “tap” the menu button to share the document.
-
Lastly, check out some of the other features of Notability. It’s a powerful note-taking App that has lots of useful features.
-
What can Notability do? Features – Notability
- Scan Documents
- Create Books
-
Note Taking
- By hand using an Apple Pencil, using your finger, or typing
- Importing Documents for Annotation
- To-Do Lists
- Planners
- And more!
-
What can Notability do? Features – Notability
Conclusion
You should now be able to create PDFs using Notability and an iPad.
For instructional/pedagogical questions, please contact your SG&E coordinator- Amy Lesan.
For technical questions, please contact your building SPOC or Classroom Technology- Daniel Elliott,Brendon Poore.