How to Print with PaperCut
Add or remove printers easily on Windows or MacOS computers using PaperCut
Table of Contents
Product: PaperCut Print Deploy (district printing system)
Audience: Windows and MacOS users
Overview
Use this document to learn how to Print from a Windows or MacOS computer using our Print Management System, PaperCut.
Tools/Equipment Needed
- District-assigned computer (Windows or MacOS)
- District printer
Find/Add a Printer
- Click on the printer icon in your menu bar/taskbar and select View my printers.

- MacOS: icon should be near the top right corner of menu bar
- Windows: icon should be near the bottom right taskbar
- A window will pop up. On the left, click the option Add printers and a list of available printers will appear. To install a printer, simply click the Install button on the same line as the printer you need access to.
Printer Naming Conventions
Printer names are formatted with 3 parts: the school name, printer location, and printer model.
Ex. Printer name is “CHS-202-M404”. This name indicates the printer belongs to CHS, is located in Room 202, and the model is “M404”.
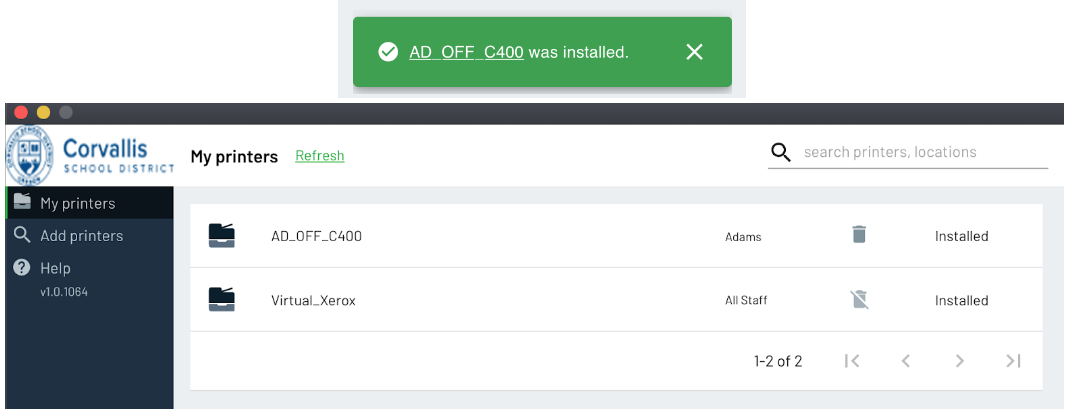
- When your printer is installed, a pop-up should appear saying [printer name] was installed. The printer name will also be added to the list under the My printers section on the left side of the menu. You are now ready to print!

- When you go back to the page you were trying to print, be sure to close and reopen the print settings pop-up (sometimes new printers won’t show up unless you do this). If you still don’t see the printer, be sure to select See more… under the printer options.
Conclusion
For instructional/pedagogical questions, please contact your Building Administrator or Student Growth & Experience (SG&E) Level Coordinator.
For technical questions, please contact your building SPOC.
