How to Print with PaperCut
Learn how to print from district-assigned devices using our managed print system, PaperCut.

Written by Alison Bowden
Updated at March 20th, 2026
Table of Contents
Product: PaperCut Print Deploy (Windows/MacOS), PaperCut Mobility Print (Chromebooks/Chrome Browser), & iPad Printing
Audience: Any user with a CSD email account and a district-assigned device (generally staff/students)
Overview
Use this document to learn how to access our print management system, PaperCut, from a district-assigned device while in a school building. Users will also need a CSD email as these accounts are used for authentication and job logging. Printing is not possible from personal devices or when users are connected to the CSD Guest wifi. In these cases (eg student teachers on personal computers), users may connect directly to a printer using a USB cable.
Virtual Xerox
Sometimes called “find-me printing”, all staff have permission to print to a destination called Virtual Xerox (it may also appear as Virtual Xerox on papercut.csd509j.net). Sending documents to Virtual Xerox allows staff to securly print from any copier in the entire district using their staff badge (students do not have permissions to access this printer and must use the student-assigned printers at their school, typically available only at the high school level).
We recommend using Virtual Xerox for a variety of reasons:
- Security: documents will not print until you are physically present at the copier. This prevents sensitive information from being left out in the print tray.
- Ease of Use: You won't have to remember “which printer did I select?” and waste time searching for your document around the school. Instead, you're in control of which copier will print your files by scanning your badge at the most convenient copier location.
- Print Speed: copiers have a faster “pages per minute” print speed than most standalone printers, allowing you to finish larger print jobs faster.
Release Virtual Xerox Documents
After choosing the Virtual Xerox printer and selecting print, scan your badge at any copier's card reader and you will be signed into your PaperCut account.

Once logged in, you will have the option to print all your pending documents or use the print release button to only print specific files.


Printer Naming Conventions
Printer names are formatted with 3 parts: the school name, printer location, and printer model.
Ex. Printer name is “CHS-202-M404”. This name indicates the printer is at CHS, is located in Room 202, and the model is “M404”.
Printing from Chromebooks / Chrome Browsers
Select print on your document, and a print preview will appear. In the Destination section, click the drop-down arrow to open the menu and choose See more.

A login page may appear titled Mobility Print Authentication. If this window opens, enter your first.lastname (first part of your email address before the @ symbol) and your email account password. Ensure the Remember me box is checked, then click Sign in and print.

When the Select a destination window appears, you will see your full list of printers accessible from your account. Select your desired printer and print!

Printing from Windows / MacBooks
Install a Printer
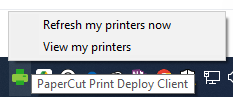
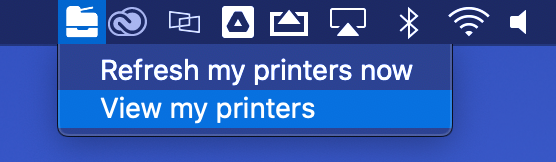
Click on the printer icon in your menu bar/taskbar and select View my printers.

- A window will pop up. In the left column, click the Add printers option and a list of available printers will appear. To install a printer, simply click the Install button on the same line as the desired printer
- In some cases, you may be asked to login before installing. simply enter your first.lastname for the user name (first part of your email address before the @ symbol) and your computer password.
- In some cases, you may be asked to login before installing. simply enter your first.lastname for the user name (first part of your email address before the @ symbol) and your computer password.
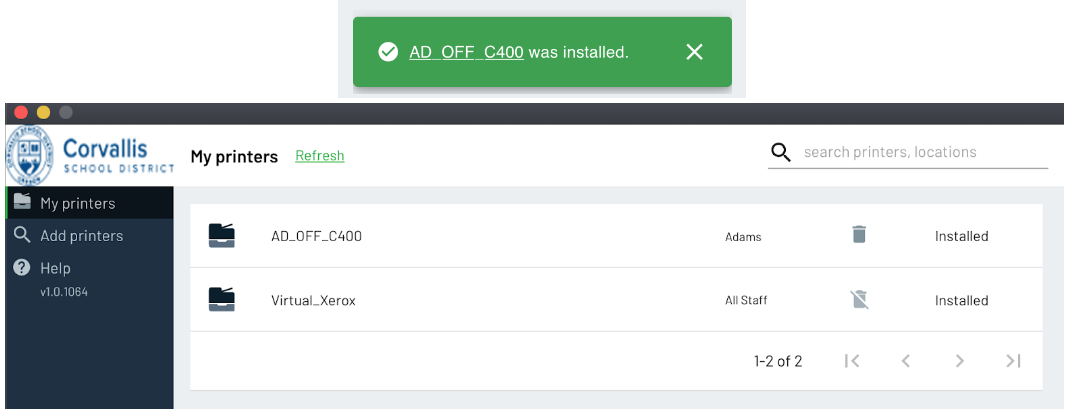
- When your printer is installed, a pop-up should appear saying [printer name] was installed. The printer name will also be added to the list under the My printers section on the left side of the menu. You are now ready to print!
- When you return to the page you were trying to print, be sure to close and reopen the print settings pop-up (sometimes new printers won’t appear unless you do this). If you still don’t see the printer, be sure to select See more… under the printer options.
Print Deploy vs Mobility Print
Windows and MacBook users will see a longer list of printers than Chromebook users. This is because PaperCut has two methods of printing: directly installing printers via the method explained above (called Print Deploy) and through the Chrome browser extension called Mobility Print. You can identify a Mobility Print device with the green PaperCut logo.

For Windows and MacBook users, we recommend using printers installed via Print Deploy. Since Mobility Print only an extension Chrome, these printers will not appear when printing documents from outside of Chrome (eg Word documents, Excel spreadsheets, PowerPoint, etc).
Printing from iPads
On district-assigned iPads, users can print only to Virtual Xerox. If a different printer is desired, please borrow a substitute loaner Chromebook from the front office.
Google Docs & Printing
Open the document you want to print then select the 3 dots in the top right for additional settings. Press the Share and export option.


Choose the Print option and a print preview window will open.

Locating Virtual Xerox
In the print preview (or Print Options) window, tap the Printer field to select your destination.

Locate the Virtual Xerox printer and tap to select. You may be prompted for a username and password; enter your first.lastname (first part of your email address before the @ symbol) and district password.


Lastly, confirm your document settings are correct (paper size, double-sided, etc) and tap the Print button.

Your document is now waiting to be printed! Refer to the earlier section on Virtual Xerox for instructions on releasing documents for printing at any district copier.
Conclusion
For instructional/pedagogical questions, please contact your Building Administrator or Student Growth & Experience (SG&E) Level Coordinator.
For technical questions, please contact your building SPOC.