Boardroom Projector Guide

Written by Daniel Elliott
Updated at September 13th, 2024
Table of Contents
Boardroom Projector Guide
Overview
Tools/Equipment Needed
Project the Laptop Image to Screen(s)
Turn on Projector
Wired Connection- Plug in HDMI cable from the Wall Port
Wireless Connection -AirTame- to Front Screen (CSD Staff Only)
Connecting a MacBook
Connecting Windows Device
How to use Microphones (Lightspeed)
Turn the Microphone(s) On
Boardroom Projector Guide
Product: Projectors, AirTame, Microphones
Overview
Guide on how to use the Technology in the Boardroom.
Tools/Equipment Needed
-
Laptop
Project the Laptop Image to Screen(s)
Turn on Projector
-
Both projectors work using the same remote. Point the remote at the projector and press the power button to turn it on. You’ll likely need to do this twice if you want both projectors on simultaneously.
- If the image isn’t displaying correctly, try pressing the “Source Search” button on the remote. This will switch between wireless (see Wireless instructions) and wired (see Wired Connection instructions) connections.
- Volume of Video(s) is controlled by the FRONT Projector using the Remote and/or the laptop connected to the projector.


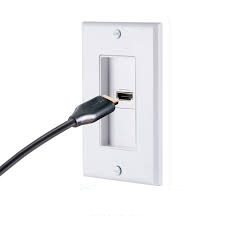
Wired Connection- Plug in HDMI cable from the Wall Port
-
There is an HDMI cable plugged into a Wall Port at the front of the room, to the right of the projector screen. Take that cable and plug it into the laptop or dongle that you want to connect to the projector(s).
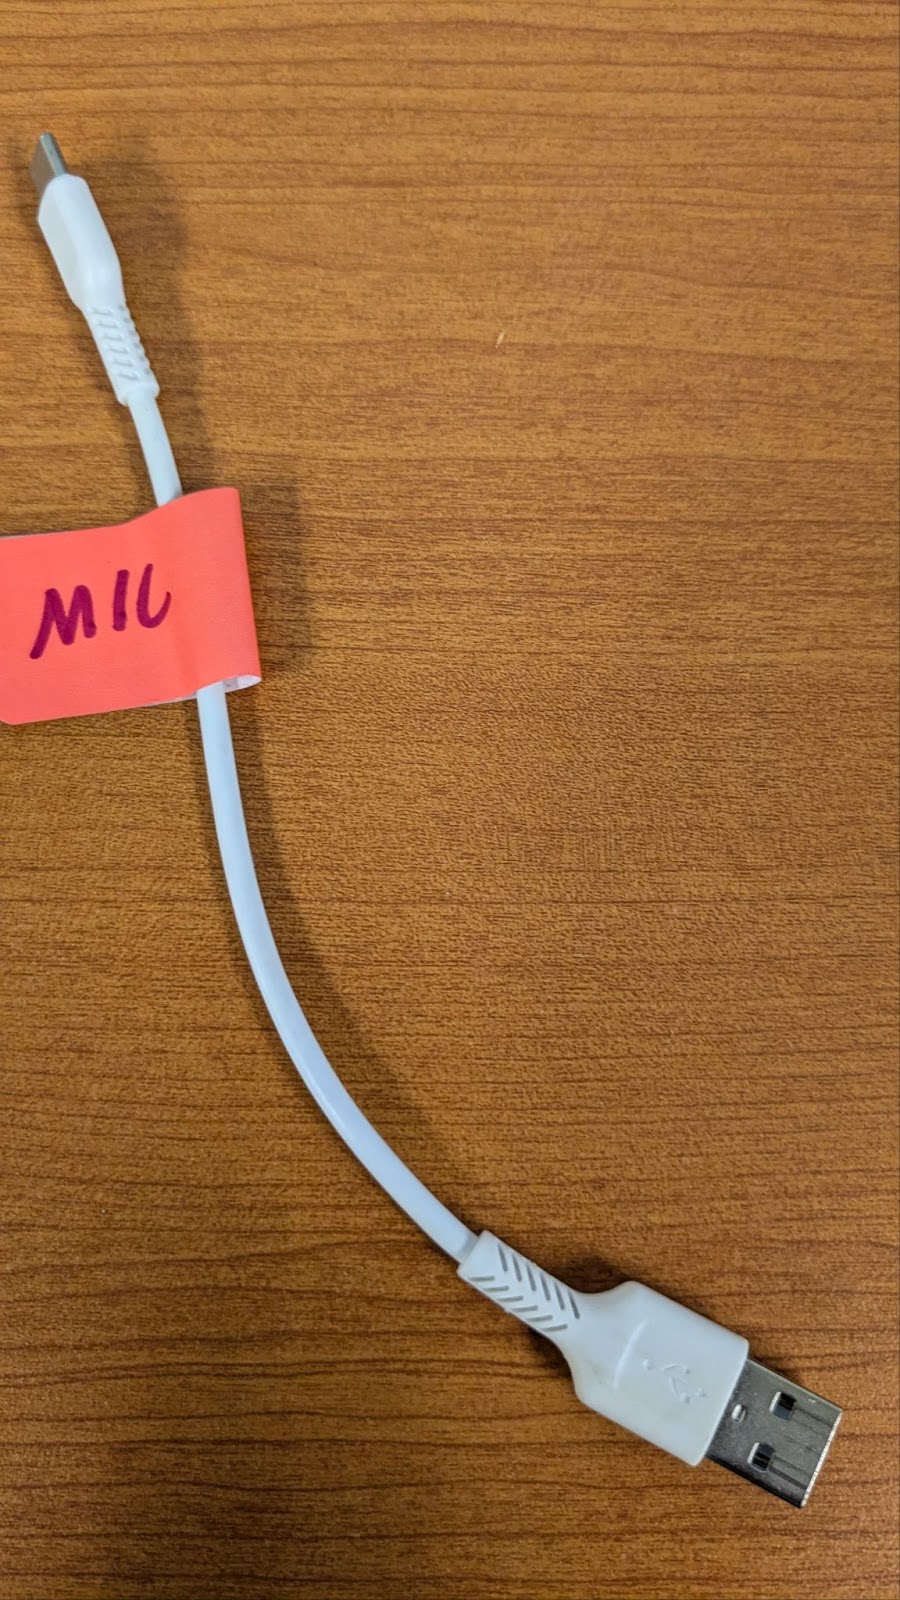
- If your laptop does not have an HDMI port, there should be a USB-C dongle/adapter that can be used to connect the cable to your laptop. See image below.
- If the projector(s) are not displaying your laptop screen, try pressing “Source Search” button on the remote.

Wireless Connection -AirTame- to Front Screen (CSD Staff Only)
Connecting a MacBook
- The first step is to Turn On the Projector.
-
Connecting from a MacBook and iPad will be an easy process using “Screen Mirroring”.
-
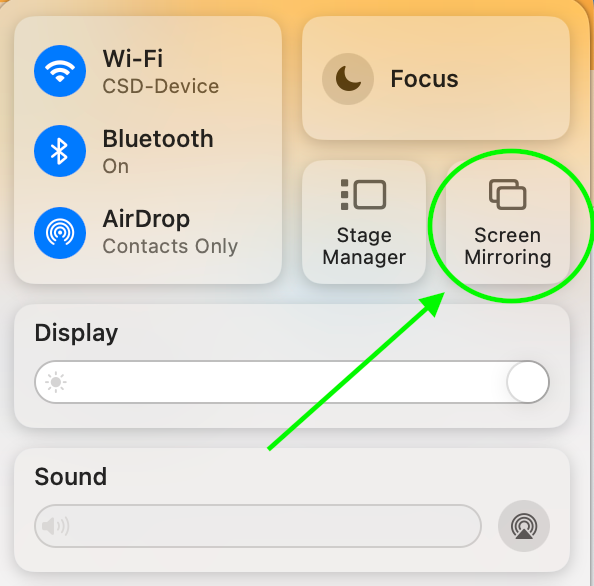
On a MacBook, click on the Control Center icon located on the top right of your screen.
-
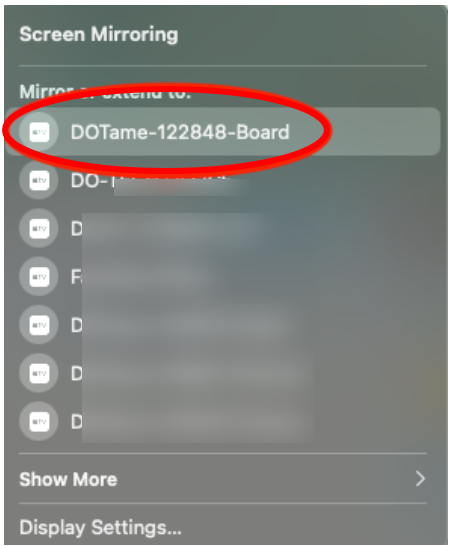
A menu will appear and now click on “Screen Mirroring”
-
Another menu will appear listing all the nearby devices that can be connected. Note the AppleTV logo and the name of the connection will be the same as displayed on the TV/Projector screen. In this example, we are connecting to DOTame-122848-Board.
-
On a MacBook, click on the Control Center icon located on the top right of your screen.
- To disconnect, reopen the screen mirroring menu and click on the connection again. You should no longer be displaying your screen.
Connecting Windows Device
-
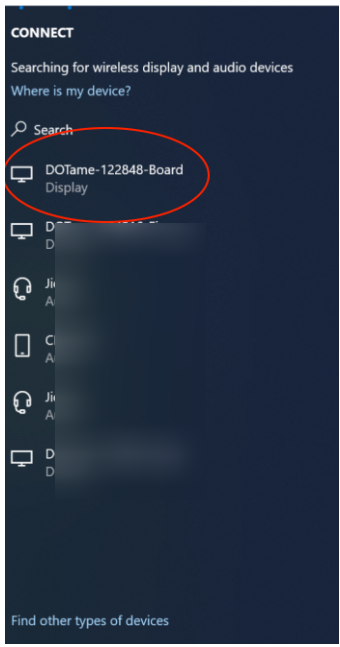
Press the (Windows key)+K at the same time to pull up the Connect menu.
-
Next, select the AirTame you'd like to connect to (DOTame-122846-Board). You should now be mirroring your screen to the Front Projector.
- To disconnect, reopen the Connect menu (Windows key+K) and click on the connection again. You should no longer be displaying your screen.
-
Next, select the AirTame you'd like to connect to (DOTame-122846-Board). You should now be mirroring your screen to the Front Projector.
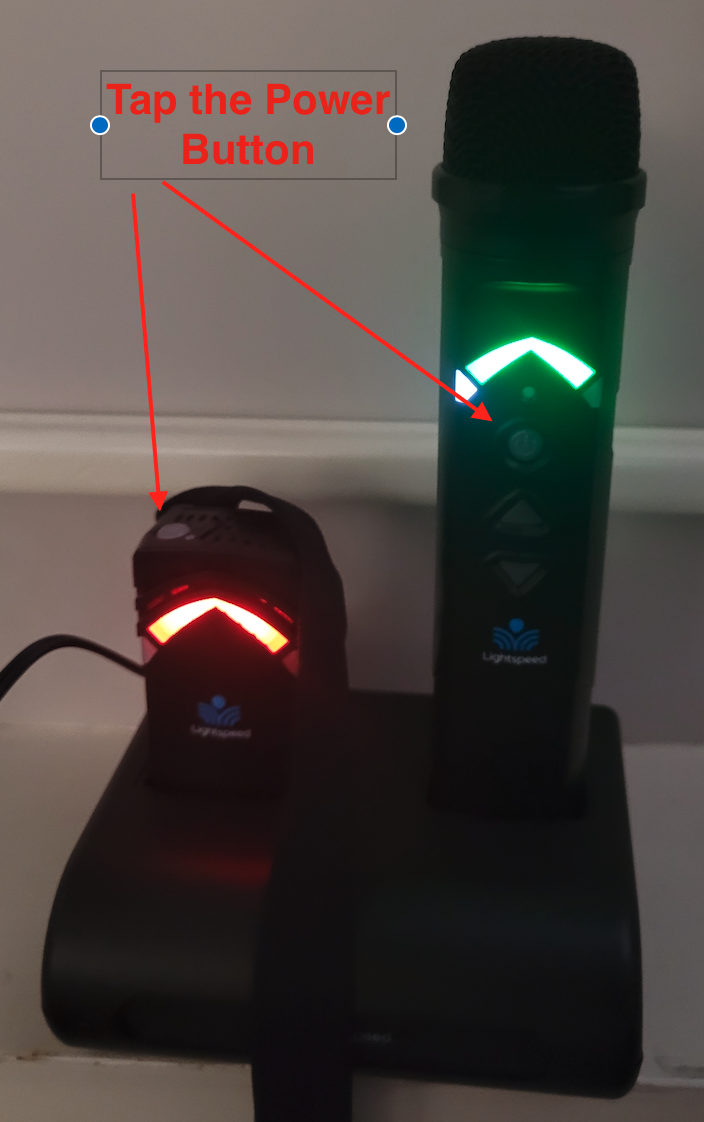
How to use Microphones (Lightspeed)
Turn the Microphone(s) On
-
A quick Tap of the Power button will turn the Microphone On.
- The Power button icon will turn BLUE when on.
-
Another quick Tap on the Power button will turn the Microphone Off.
- A USB-C cable can connect a laptop for room speaker audio.
- Please place the Microphones back in the charging cradle when you are done using them!